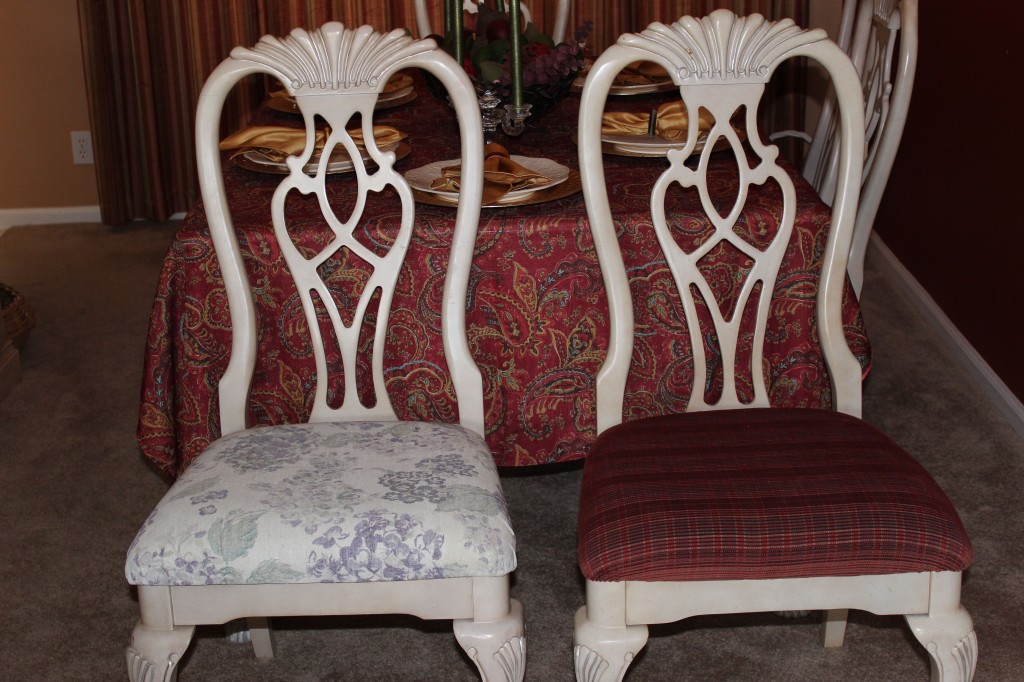
Have you ever fallen in love with a vintage dining room set but been turned off by the seat fabric? Today, I am going to show you how to breathe new life into an old piece of furniture by recovering a chair seat. This is a great project for DIY beginners because absolutely no sewing is required. All you will need is fabric, a screwdriver, pair of scissors, and a staple gun with plenty of extra staples. There are many other reasons to recover a chair seat as well, including stained seats, rips in the current fabric, or a recent move that causes your old fabric to no longer coordinate with your dining room color scheme. Here is a step-by-step tutorial on how to recover seats complete with a guided video. Happy redesigning!
Step 1:
Measure your existing seat cushions to determine how much fabric you will need to complete your project. Keep in mind that most decorator fabrics measure 54 inches wide. For my chairs, I was able to get two seats out of one width of fabric, allowing me to recover all six dining room chairs with just two yards of fabric. My video also talks about fabric selection so feel free to watch it if you still have fabric questions. Don’t hesitate to use the employees at your local fabric store to help you select a durable fabric and to make sure that you have plenty of yardage.
Step 2:
Remove the seat from the chair frame by unscrewing the three or four screws that are located under the cushion.
Step 3:
Cut a piece of fabric that is a couple inches wider and taller than your seat and place it right side down on the floor. Center your cushion on top of the fabric. Start in the center of one of the sides and staple the fabric to the underneath of the seat. Once you have three or four staples in place, do the same thing to the opposite side, making sure to pull the fabric taught. Continue this process until you have done the center of all four sides.
Step 4:
Stapling the corners is a bit tricker. Staple the center of the corner first, pulling nice and tight. Continue working with finger-width sections, pulling tight and stapling. This is where you want to smooth out as much puckering as possible with nice tight staples.
Step 5:
Flip the cushion back over, makes sure everything looks great, and then screw the seat back onto the chair frame. Continue this process until you have all six chairs completed. It is as easy as that to completely update the look of your favorite dining room furniture.
About Philip Travers
Twitter •


 WishLists
 My Account


