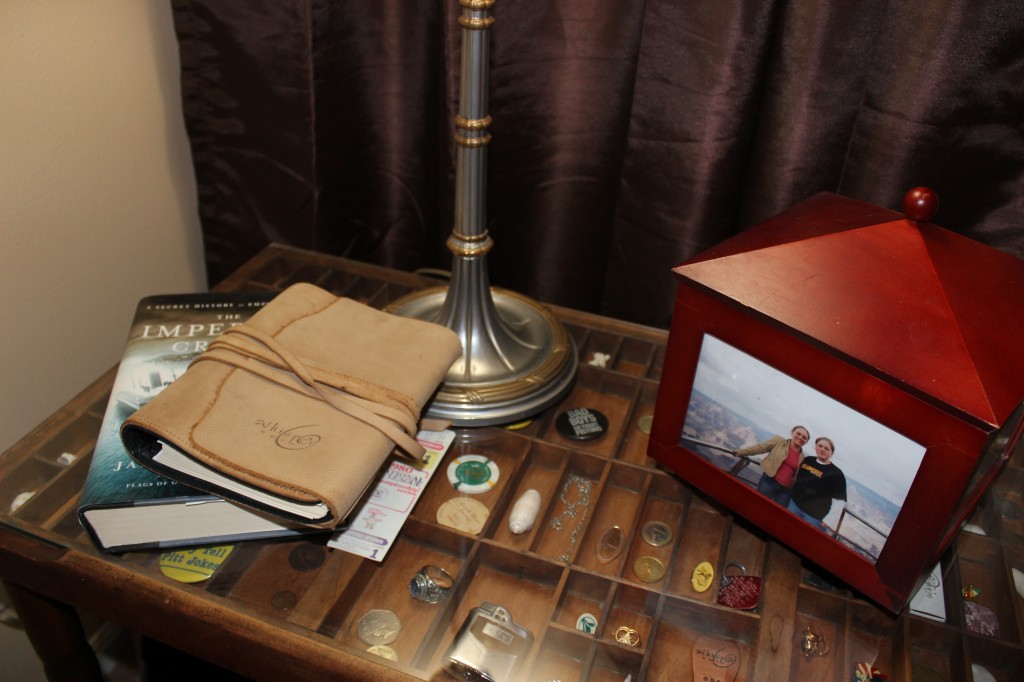
I love adding custom touches to my home and with these printer’s tray side tables, I am able to add a custom piece and a special project all in one. Not only is this table a sure-fire conversation starter, it is also easy enough for beginner DIYers. My inspiration for this table came from a pair of beautiful vintage printer’s trays that I found at a local antique store. I wasn’t quite sure how I was going to use them but I had to have them. That is when the inspiration came for them to be turned into a table. I purchased four table legs and four leg brackets from my local home improvement store. Here is the complete how-to on how a couple simple items turned into a pair of functional yet stylish night stands.
Stain the Legs
The first step in this process is to stain the legs to match the printer’s trays. Let the legs dry completely before moving on to the next step of the process.
Mount the Brackets
Next, turn the legs over and mount all four leg brackets to the corners. Make sure to install them securely to add stability to the table.
Screw in the Legs
With the brackets mounted, go ahead and screw in each of the four table legs.
Fill the Table
With the legs on, go ahead and turn the table over and fill it with little family knick-knacks and trinkets. You don’t have to fill every space, but the majority of them should have something inside. I used a combination of family heirlooms and seashells that I collected from my local beach.
Add a Glass Top
The trickiest part of the whole project is getting a piece of glass for the top. To do this, measure the dimensions of the printer’s tray carefully and then go to your local glass shop. Ask them to cut you a piece of nice, thick glass for you. I chose 1/4 inch glass because I wanted it to be strong enough for a night stand and some other night stand essentials.
Change Things Up
I used a printer’s tray and legs that were the appropriate height for a side table but you could change things up by using a different foundation piece. Use shorter legs to create a coffee table or taller legs to make a stylish entry table. The choice is totally yours. If you want to get a more in-depth step by step tutorial, check out my You Tube video on this project.
About Philip Travers
Twitter •


 WishLists
 My Account


