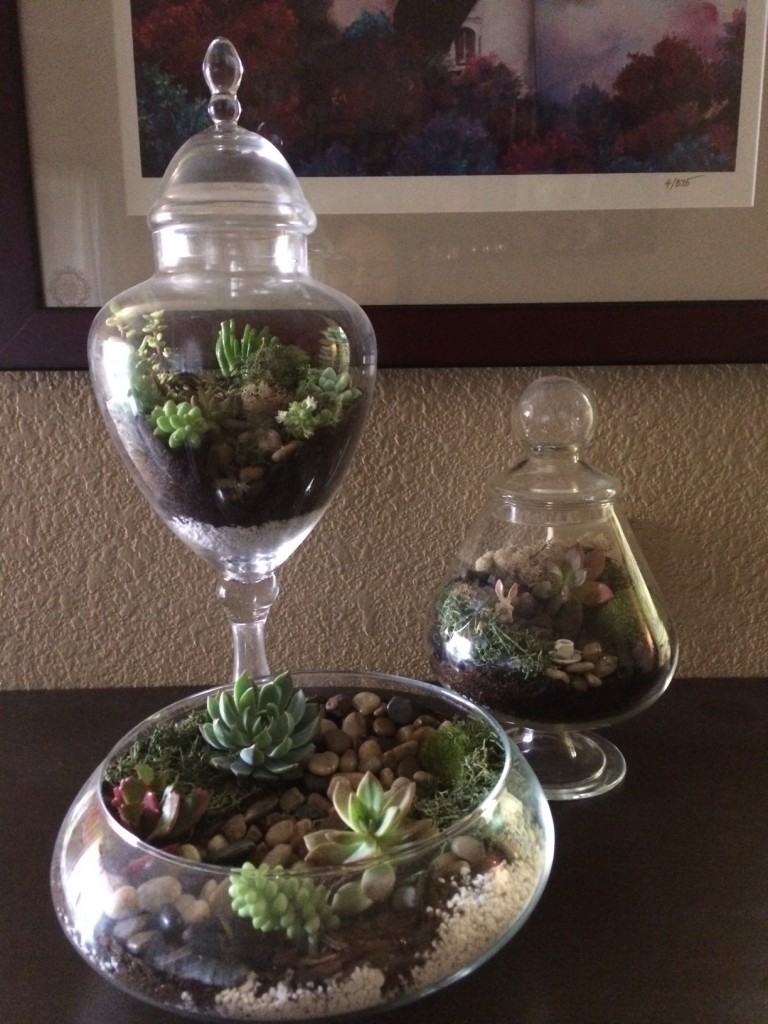
Terrariums are making a major come back right now and can be found in many home decorating stores. Instead of paying big bucks for a ready-made terrarium, make your own with just a few inexpensive products and a couple minutes of your time. My sister has been making a ton of these beauties lately and as a recent college grad, being budget conscious is a top concern. Her trick is going to thrift stores, flea markets, and estate sales in search of her glass vessels. Once she has those, the rest is a piece of cake. Here is how she does it.
Supplies:
- Clear Glass Jar or Container (cleaned thoroughly)
- Activated Charcoal (aquarium supply section of your pet store)
- Potting Soil
- Vermiculite Perlite
- Gravel or Pebbles
- Moss
- Assortment of Succulents
- Miniatures (not necessary but a very cute touch)
Step 1:
Because you are planting living plants in these terrariums, it is important to establish proper drainage. Pebbles, gravel, or anything that resembles it will serve this purpose well. Lay down a layer of gravel that is roughly 1/6 of the height of the vessel.
Step 2:
The next layer that you are going to place in the terrarium is a mixture of potting soil and activated charcoal. The charcoal is an important component of both open and closed terrariums because it keeps the soil layer fresh and healthy for the plants. This layer should also be about 1/6 of the height of the container. This depth may need to be adjusted if you have a larger plant that has a bigger root system. If so, just add enough soil to accommodate the root systems of your succulents.
Step 3:
It is time to start planting an assortment of succulents and small pieces of greenery. If pruning is necessary, go ahead and do that before you do your arranging. Make sure there is enough distance between plants for each of them to thrive. Overcrowding will hurt the health of the plants in the long run because they will continue to grow.
Step 4:
Now that all your plants are pruned and in place, it is time to put on your own personal finishing touches. Choose a decorative ground cover of your choice. This could be moss, spanish moss, pebbles, sand, or anything else that you find appealing to the eye. This is also when you can go ahead and add little ceramic, plastic or glass miniatures to your landscape design. If you are making your terrarium in time for easter, a little bunny would be an adorable addition.
Step 5:
Once your terrarium is done, you have to maintain it. Make sure that the soil remains moist with occasional watering. While it is a good idea to let your terrariums stay in the shade for a day or two after planting, you will want to move them to a spot thereafter that has either some natural or artificial light. Both your watering and light exposure should be adjusted in accordance to the plants that you are using.
Making a DIY terrarium is a fast and easy way to introduce greenery to your home. Hopefully this project inspired you to make some custom terrariums for your home. It is a great way to introduce some greenery to a bookshelf or mantle and they are so low maintenance. Vases, apothecary jars, bowls, and any other clear glass container is an ideal container for terrariums and they look so sophisticated in larger groupings such as the one shown. If you try this project at home, be sure to send us a picture of your finished product.
About Philip Travers
Twitter •


 WishLists
 My Account


